Computed tomography systems are checked periodically. The RaySafe X2 CT sensor is a valuable measuring instrument for these purposes. In this blog, you can read about the key features of the RaySafe X2’s CT sensor.
Ionization chamber & parameters
The CT sensor is the only RaySafe X2 sensor with an ionization chamber. You connect the CT sensor using the standard USB cable supplied, and you can then perform all relevant measurements directly. As soon as you connect the sensor, the X2 base unit recognizes the sensor immediately. A self-test and stabilization are performed, after which the four relevant parameters appear on the screen:
- dose
- dose rate (also in waveform)
- dose length product
- exposure time (also in waveform)
For a kVp measurement, use the R/F sensor of the RaySafe X2.
Correction for temperature and pressure
The CT sensor has a built-in temperature and pressure sensor. The sensor corrects the measurement performed directly based on the live measured ambient temperature and pressure. You can read this data back using the RaySafe View software.
CTDI measurement in combination with phantom
With the Nested Adult Head & Body CTDI phantom, you can perform specific CTDI measurements. You position the CT sensor of the RaySafe X2 in the correct phantom and perform the measurement in all five positions. If you do this via the RaySafe View software, the measured values are automatically read in and calculated in the supplied Excel file.
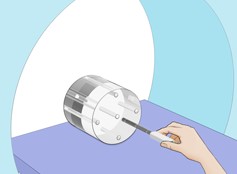
With the RaySafe X2 Flexistand, you can also position the CT sensor ‘free in the air’ as shown in the image below. You can easily center it using the markings on the sensor.

Stop/delay setting
A useful function of the CT sensor is the Stop/delay setting. This allows you to determine within what time the device generates a new measurement and whether the measured radiation is added to the current measurement. Use a longer stop/delay setting for measurements with a phantom and slow rotation. This prevents an axial scan from being divided over two measurements.
